CUDA Program Using Singularity Environment
Step 1: Create Singularity Image (CUDA)
Section titled “Step 1: Create Singularity Image (CUDA)”To create SIngularity image (CUDA), run below command in the SSH terminal (CLI), for tutorial in accessing CLI, please refer to SSH Shell Access to EdUHK HPC Platform and Cluster (Web-based Shell Access)
# Create new directory (if needed)$ mkdir /home/${USER}/singularity_image
# Pull docker image by singularity$ cd /home/${USER}/singularity_image$ module load singularity$ singularity pull docker://nvidia/cuda:12.8.0-devel-ubuntu24.04
# List pull image# (Example:cuda_12.8.0-devel-ubuntu24.04.sif)$ ls –al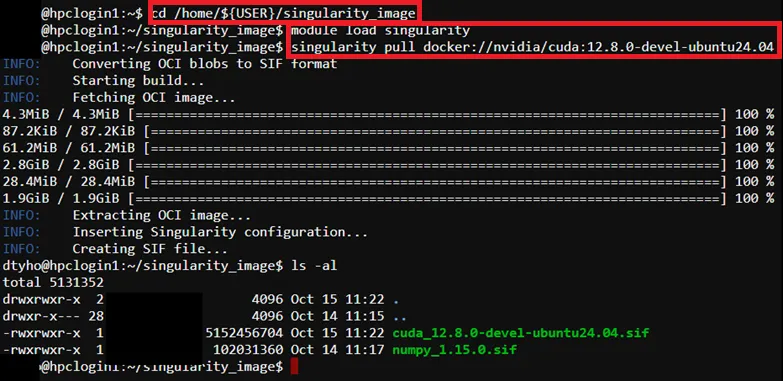
Step 2: Prepare CUDA Program Source Code
Section titled “Step 2: Prepare CUDA Program Source Code”For the example source code please refer to CUDA Program Source Code (Example)
Step 3: Prepare job template script
Section titled “Step 3: Prepare job template script”Pre-configured template script path → /home/$USER/job_template/slurm_job/cuda_singularity.sh
#!/bin/bash#SBATCH --job-name=cuda_singularity ## Job Name#SBATCH --partition=shared_gpu_l40 ## Partition for Running Job#SBATCH --nodes=1 ## Number of Compute Node#SBATCH --ntasks=1 # Number of Tasks#SBATCH --cpus-per-task=2 ## Number of CPU per task#SBATCH --time=60:00 ## Job Time Limit (i.e. 60 Minutes)#SBATCH --gres=gpu:l40:1 # Number of GPUs per node (i.e. 1 x l40 GPU)#SBATCH --mem=10GB ## Total Memory for Job#SBATCH --output=./%x%j.out ## Output File Path#SBATCH --error=./%x%j.err ## Error Log Path
## Initiate Environment Modulesource /usr/share/modules/init/profile.sh
## Reset the Environment Module componentsmodule purge
## Load Modulemodule load singularity
## Run user commandsingularity run --nv \--bind /home/${USER}/job_template/C \/home/${USER}/singularity_image/cuda_12.8.0-devel-ubuntu24.04.sif \nvcc -o pi_cuda /home/${USER}/job_template/C/cuda_pi.cu && \./pi_cuda
## Clean uprm pi_cuda
## Clear Environment Module componentsmodule purge
Step 4: Submit HPC Job
Section titled “Step 4: Submit HPC Job”Guides for submitting HPC job, please refer to: HPC Job Submission (For CLI) and HPC Job Submission (For Web Portal)
Step 5: Remove Singularity Image (Optional)
Section titled “Step 5: Remove Singularity Image (Optional)”$ rm /home/${USER}/singularity_image/<image file>.sif